Designer Guide
Guides
How to Use the Designer
The Designer lets you draw your own cross-stitch patterns from scratch on a pixel grid. Think of it like graph paper on your screen — you click squares to place stitches, pick your colours, and build up a design stitch by stitch. It's perfect for geometric patterns, custom borders, small motifs, and anything you want complete control over.
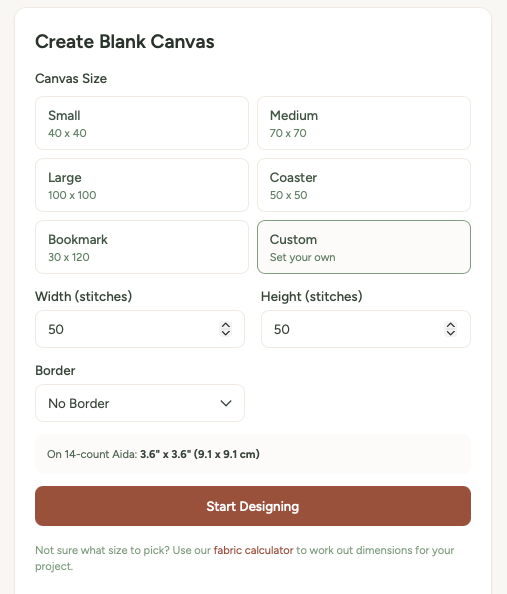
Setting up your canvas
- Go to the Designer page.
- Choose a canvas size. You can pick from presets (bookmark, coaster, small motif) or enter custom dimensions.
- Optionally choose a border style — this adds a decorative border around the edge of your canvas.
- Pick a border colour if you've selected a border.
- Click Create Canvas to open the drawing editor.
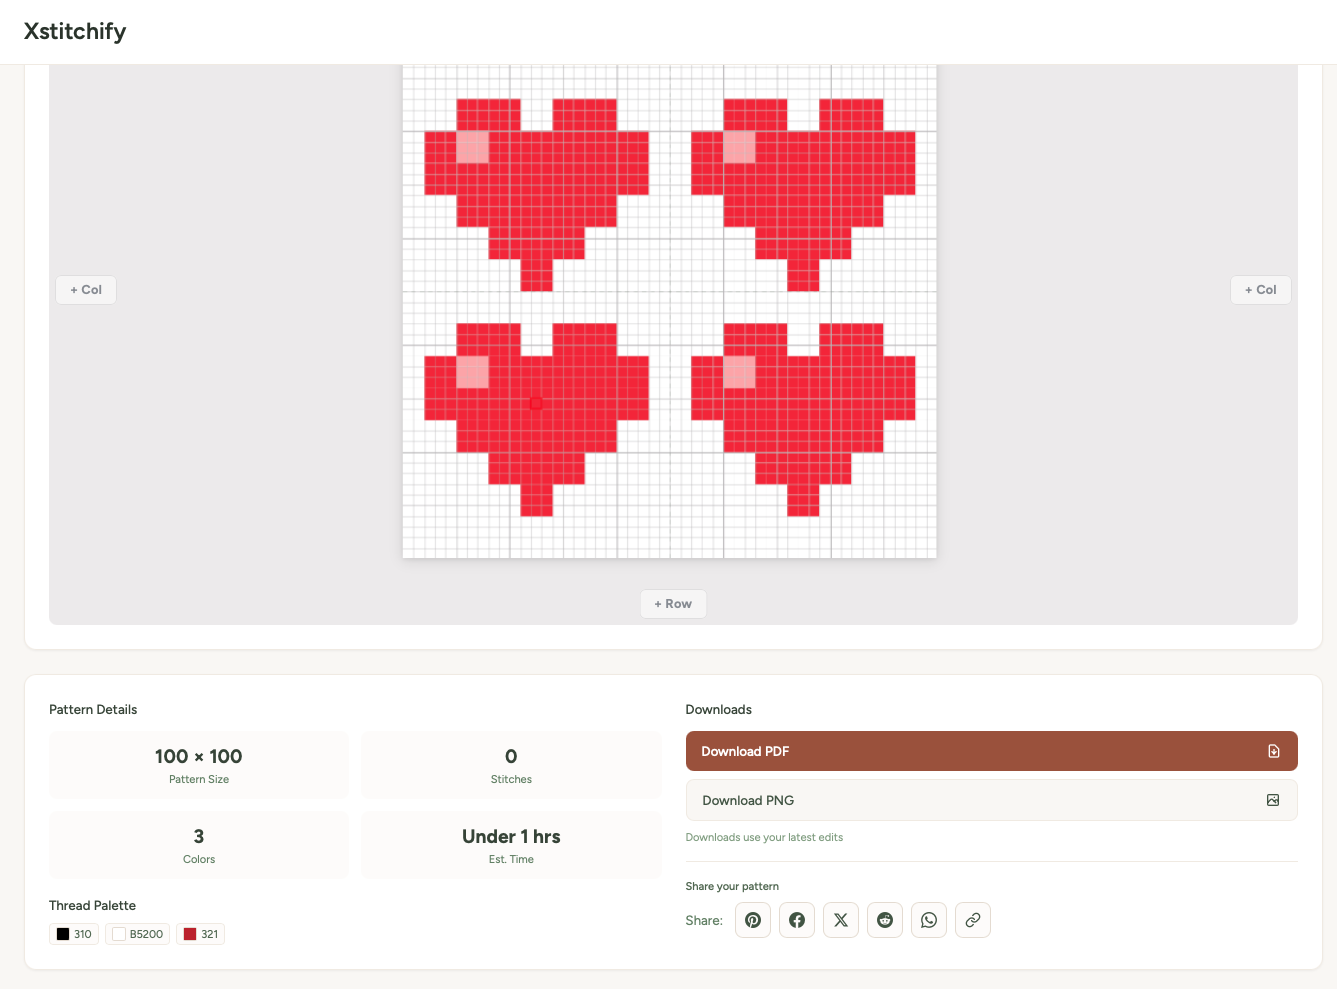
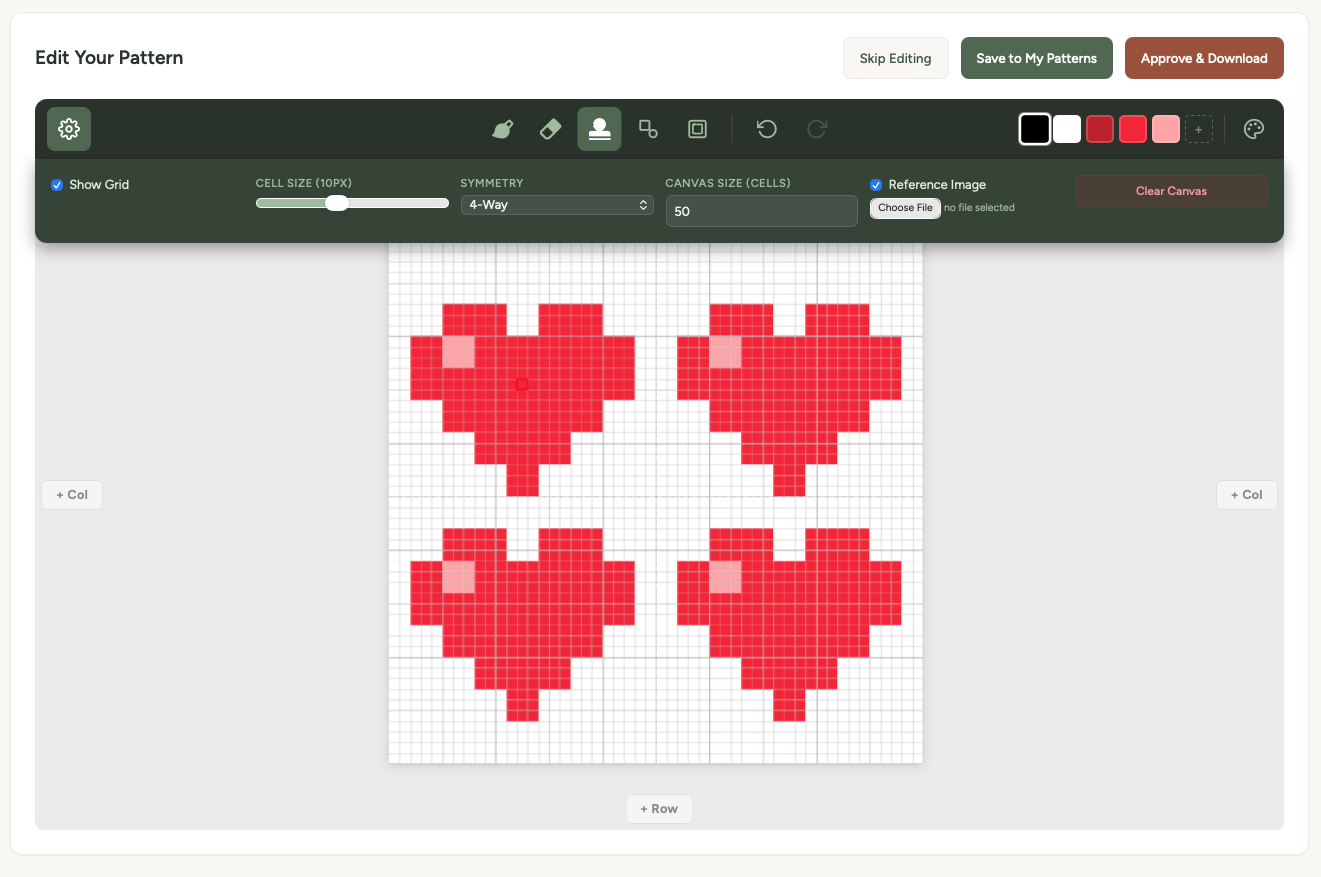
The pixel grid
Once your canvas is created, you'll see a grid where each square represents one cross-stitch. Click or tap on any square to place a stitch in your current colour. Click an existing stitch to remove it. On tablets and phones with touchscreens, you can draw by dragging your finger across the grid.
If you're using an iPad with an Apple Pencil, you'll get precise, responsive drawing — it feels just like filling in a chart on paper.
Colour picker and DMC threads
The colour picker lets you choose from DMC thread colours. Pick a colour, then click on the grid to place stitches in that colour. You can switch colours as often as you like — each colour gets its own symbol in the final chart.
Your chosen colours appear in a palette bar so you can quickly switch between them as you work. The final pattern PDF will include the DMC numbers and names for every colour you've used.
Symmetry tools
The symmetry tools are incredibly handy for geometric designs. When you enable symmetry, every stitch you place is automatically mirrored:
- Horizontal symmetry — mirrors left to right
- Vertical symmetry — mirrors top to bottom
- Both — mirrors in all four quadrants
This means you only need to draw one quarter (or one half) of a symmetric design, and the tool fills in the rest for you. It's a massive time-saver for mandalas, snowflakes, and border patterns.
Border options
When setting up your canvas, you can choose from several border styles that automatically frame your design. These are pre-made cross-stitch border patterns that sit around the edge of your canvas. You can pick the border colour to match your design.
Borders are great for bookmarks, coasters, and samplers where you want a polished, finished look without having to draw the border yourself.
Saving your design
As you work, you can:
- Save to Library — stores your design in your account so you can come back and keep editing later.
- Download as PDF — gives you a full chart with symbols, grid lines, and a DMC thread key.
- Download as PNG — a pixel-perfect image of your design.
Tips for designing
Start small. Your first design doesn't need to be a 200-stitch masterpiece. Try a 20x20 grid and make a simple motif — a heart, a star, a little house. Get comfortable with the tools first.
Use symmetry for geometric designs. Snowflakes, mandalas, Celtic knots — anything with repeating patterns becomes four times faster with symmetry turned on.
Fewer colours, stronger impact. A two or three colour design often looks more striking than one with ten colours. Constraints breed creativity.